The complete Lavarel framework development tutorial

Powered by Blogger.

Showing posts with label laravel views. Show all posts

Thursday, 2 February 2017

Link external files to laravel views


While designing a web page, we often need to link external files like stylesheets, js files or images to a web page. If we are not using any framework, then we just put all the files to any folder and gives the path of that file to include into the web page. But in case of laravel the views are stored in a folder, which is not accessible for users. So, we can't just paste the files in resources folder, where we store the views.

In this tutorial, we will learn to link external files to laravel views. I assume that, you all know how to create a view in laravel. You can have a detailed tutorial on Laravel views by clicking on below link-

http://www.w3laravel.com/2016/07/laravel-views-tutorial-creating-view.html

Link external files to laravel views

To link external files to laravel view, first you need to copy all of your files to the public folder. This is not mandatory, but you can have three different folders like css, js and images for different kind of files. I assume that you have three new folders css, js and images and copied all the files to the corresponding folders. Now we need to include those files to views. We can use asset function to link all kind of files. Let's see how these can be done.

Link a css file

To link a css file, use assest to your head section of html-
<link href="{{ asset('css/css-file-name.css') }}" rel="stylesheet">
Here, in the asset function we need to write the path of the file excluding public folder.

Link a js file

To link a js file, use assest to the view-
<script type="text/javascript" src="{{ asset('js/jquery.js') }}"></script>
Here, in the asset function we need to write the path of the file excluding public folder.

Inserting an image to a view

To insert an image to a view, we can use asset function to attribute of img tag.
<img src="{{asset('images/image-name.png')}}" />
Here, in the asset function we need to write the path of the file excluding public folder.

Link files through CDN

To link files through CDN, we don't need anything to do extra. Just link files as you are linking in normal simple files.
<link rel="stylesheet" href="link-to-file">

Conclusion

So, by using asset function we can include all type of files to a laravel file. Share the tutorial Link external files to laravel views like stylesheets or images to help others too.

Friday, 22 July 2016

Laravel Views Tutorial- Creating a View


In the last tutorial HTTP Routing- Laravel Routing Tutorial we learnt about setting a custom url for your routes in the web application. In this tutorial we will learn to separate our application logic from the presentation logic i.e. will learn to create a view in our web application. The views contain all the html that has to be shown on the web page or the outputs that we want to echo out. So follow the post Laravel Views Tutorial- Creating a View to know how to create a view in laravel.

Laravel Views: Basics


Route without a view


We already have learnt how to create a route in our previous tutorial. Let create a route that displays some html element.

So, open your routes.php file and create a route like this.
Route::get('sample', function(){
 echo '<html><head><title>Welcome to W3Laravel</title></head>';
 echo '<body><h1>This is the first heading</h1><p>This is the first paragraph of this website</p>';
 echo '</body></html>';
});

Open this route in your favorite web browser http://localhost/w3laravel/public/welcome (Replace w3laravel with your project name).

Here is the output

Route- Laravel Views Totorial- Creating a View- W3Laravel


It works well, but it is very difficult to write whole program ( html elements, php codes) into echo commands.

So, what we will do? We will create a view and separate the presentation logic from the application logic.

How it can be? It can be done using Laravel Views. So, let's move ahead and create a view.

Creating a view


  • Create a new file sample.php into resources -> views folder.

  • Write some html codes. For ex-
    <!DOCTYPE html>
    <html>
    <head>
     <title>Welcome to W3Laravel</title>
    </head>
    <body>
     <h1>This is the first heading</h1>
     <p>This is the first paragraph of this website</p>
    </body>
    </html>

  • Go back to the routes.php and change the sample route like this.
    Route::get('sample', function(){
     return view('sample');
    });

  • Now, again open sample route to the web browser and see the output. The output will be the same as before.
    View- Laravel Views Totorial- Creating a View- W3Laravel

So, we have separated the presentation logic using the concept of Laravel views.

Laravel Views: View Data


Passing Data to a view


We can also pass some data to a view. The data should be an array with key/value pairs. These data can be easily printed to our view using $key.

Let's have an example.

Passing data to a view
Route::get('sample', function(){
 $data = array(
  'var1' => 'Apple',
  'var2' => 'Microsoft',
  'var3' => 'Sony',
  'var4' => 'Dell',
  'var5' => 'HP'
  );
 return view('sample', $data);
});

Displaying data to the view
<!DOCTYPE html>
<html>
<head>
 <title>Welcome to W3Laravel</title>
</head>
<body>
 <h1>This is the first heading</h1>
 <p>This is the first paragraph of this website</p>
 <p><?php echo $var1 ?></p>
 <p><?php echo $var2 ?></p>
 <p><?php echo $var3 ?></p>
 <p><?php echo $var4 ?></p>
 <p><?php echo $var5 ?></p>
</body>
</html>

Sharing data with all the view


There can be a situation where you may need to share a piece of data with all the views. This can be done using the share() method of laravel.

  • Create two new views sample1.php and sample2.php. In the both laravel views, print the same variable $name.
    sample1.php
    <!DOCTYPE html>
    <html>
    <head>
     <title>Sample 1</title>
    </head>
    <body>
     <p><?php echo $name ?></p>
    </body>
    </html>

    sample2.php
    <!DOCTYPE html>
    <html>
    <head>
     <title>Sample 2</title>
    </head>
    <body>
     <p><?php echo $name ?></p>
    </body>
    </html>

  • Open the file routes.php and create two corresponding routes sample1 and sample2.
    Route::get('sample1', function(){
     return view('sample1');
    });
    
    Route::get('sample2', function(){
     return view('sample2');
    });

  • Open the file app -> Providers -> AppServiceProvider.php and inside the boot method add a share() method with key/value pair like this. Here we have used name as the key, as we have printed $name in both of the views
    <?php
    
    namespace App\Providers;
    
    use Illuminate\Support\ServiceProvider;
    
    class AppServiceProvider extends ServiceProvider
    {
        
        public function boot()
        {
            //
            view() -> share('name', 'Sunny Kumar');
        }
    
        public function register()
        {
            //
        }
    }

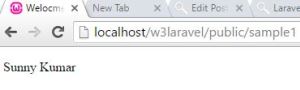
  • Run both the route into your web browser and you will get the same output.
Sample1- Laravel Views Totorial- Creating a View- W3Laravel

Sample2- Laravel Views Totorial- Creating a View- W3Laravel

Conclusion


I'm ending up with the tutorial Laravel Views Tutorial- Creating a View. We appreciate any kind of query or suggestion. So, feel free to comment if you are having problems regarding this tutorial. We will back soon with some great tutorials on laravel. Stay tuned.